This year has been my Sourdough year. I began the year learning how to create a starter, how to bake a simple loaf and now we are nearing the end of the year with my favorite of all bread, the Pumpkin Sourdough. After months of testing this recipe I am ready to share this recipe with you. It's everyone's favorite sourdough and so many friends have asked for the recipe after sharing it with them so here it is.

The basics are needed, such as a healthy sourdough starter, spring water and high quality unbleached flour. If you bake sourdough bread, you know how important these items are. Without them, it just doesn't work. So, let's get started.

Ingredients
300 Grams Room Temp Spring Water
110 Grams Sourdough Starter
12 Grams Grey or Pink Himalayan Salt
110 Grams of Pumpkin Puree
12 Grams Pumpkin Pie Spice
500 Grams Unbleached Flour

1. In a large bowl, add water, salt, starter and lightly mix with dough whisk. Add pumpkin puree and pumpkin spice. Mix with the dough whisk.
2. Add flour and with dough whisk, incorporate the flour into the wet ingredients. use fingers to lightly knead together.
3. Cover with a towel and place in a warm place and let rest for 30 minutes. I like to place my dough in an oven with the light on to keep it slightly warm because of the cool temps in our home.
4. After 30 minutes, remove towel and with wet hands, stretch and pull dough four or five times.
5. Return to warm place and let rest another 30 minutes and repeat the stretch and pull for three more times.

7. After the rise, lightly flour a counter and pour dough out onto the counter. Let rest 15 minutes.
.jpg)
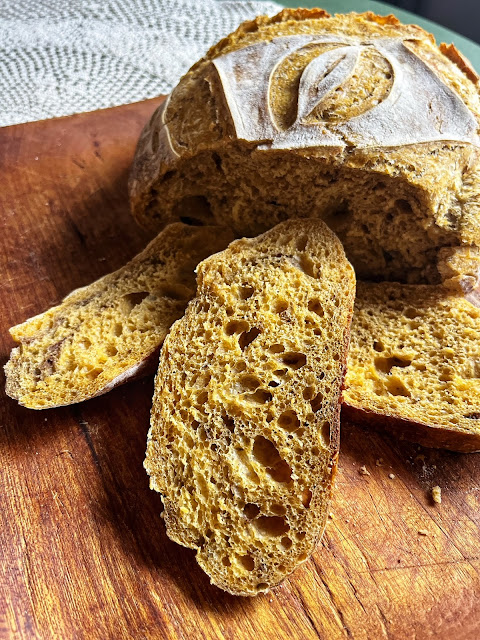
11. Place dough on parchment paper and score the dough with a razor blade to make a deep release line and any decorative cuts you desire. You can also form the dough in to pumpkin loaf by using baker's twine and tying the twine together to form the shape of a pumpkin. (See pictures above.)
12. Place the parchment paper and dough into a covered Dutch oven and bake in a covered Dutch oven at 450 degrees for 30 minutes.
13. Remove the lid of the Dutch oven and bake for 15 minutes at 400 degrees. Remove from oven and let cool.
This is the prettiest bread with a rich amber color and a light spiced pumpkin flavor. It is so good for French Toast or grilled cheese, that is if it isn't eaten entirely on the spot by your family. Just saying!


8. After it is rested for 15 minutes, stretch the dough into a softly shaped rectangle and then roll up into a ball by folding long sides over and then one end to the next. Push and roll the dough towards you multiple times to form an ball using the counter for friction.
9. Tap the dough on the counter to release dough and then place in a bantam basket, place inside a plastic bag and seal. Let is slow rise in a fridge for 12 to 14 hours.
10. After the slow proof, it is time to bake. Preheat over to 450 degrees and preheat the Dutch oven pan and lid in the oven too.
.jpg)


.jpg)

.jpg)


.jpg)
.jpg)


.jpg)