Wednesday

New Wilde Bloem Flowers

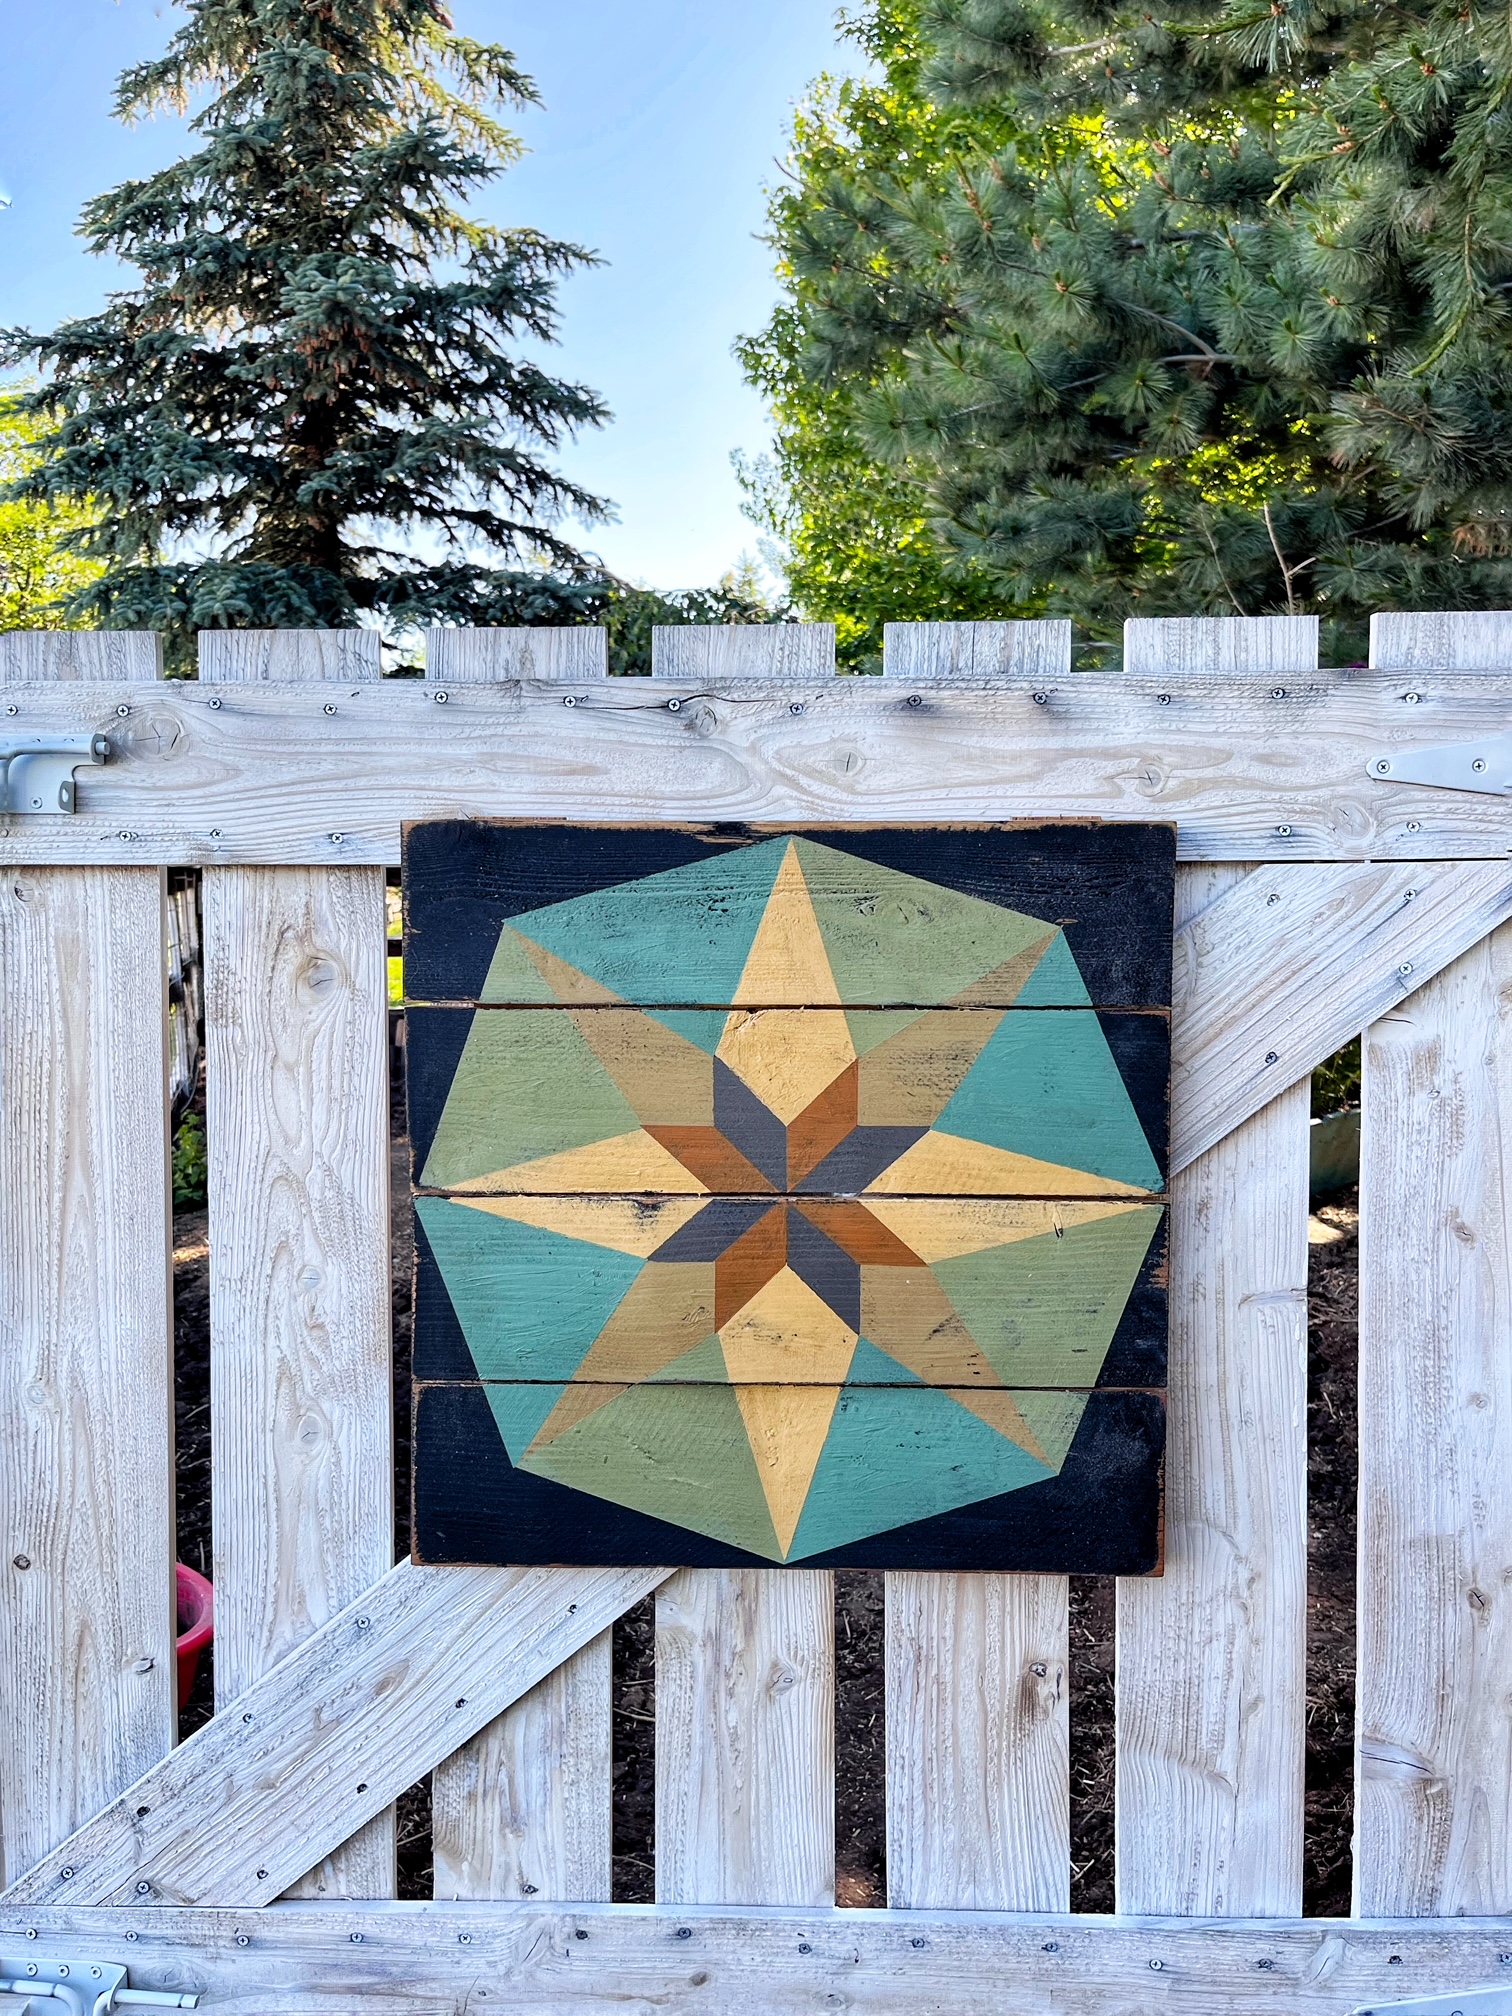
Our two new Wilde Bloem flowers are releasing today.  We are excited to add Bloeming Sunflowers and Wilde Clover to our growing collection of floral inspired barn quilts, barn quilt kits and patterns.   Both of these flowers are dear to our hearts because of the symbolism in each of them.  All of the Wilde Bloem flowers were chosen for their meanings and for design elements that make them extra beautiful in paint and cloth quilts.


Bloeming Sunflower Barn Quilt


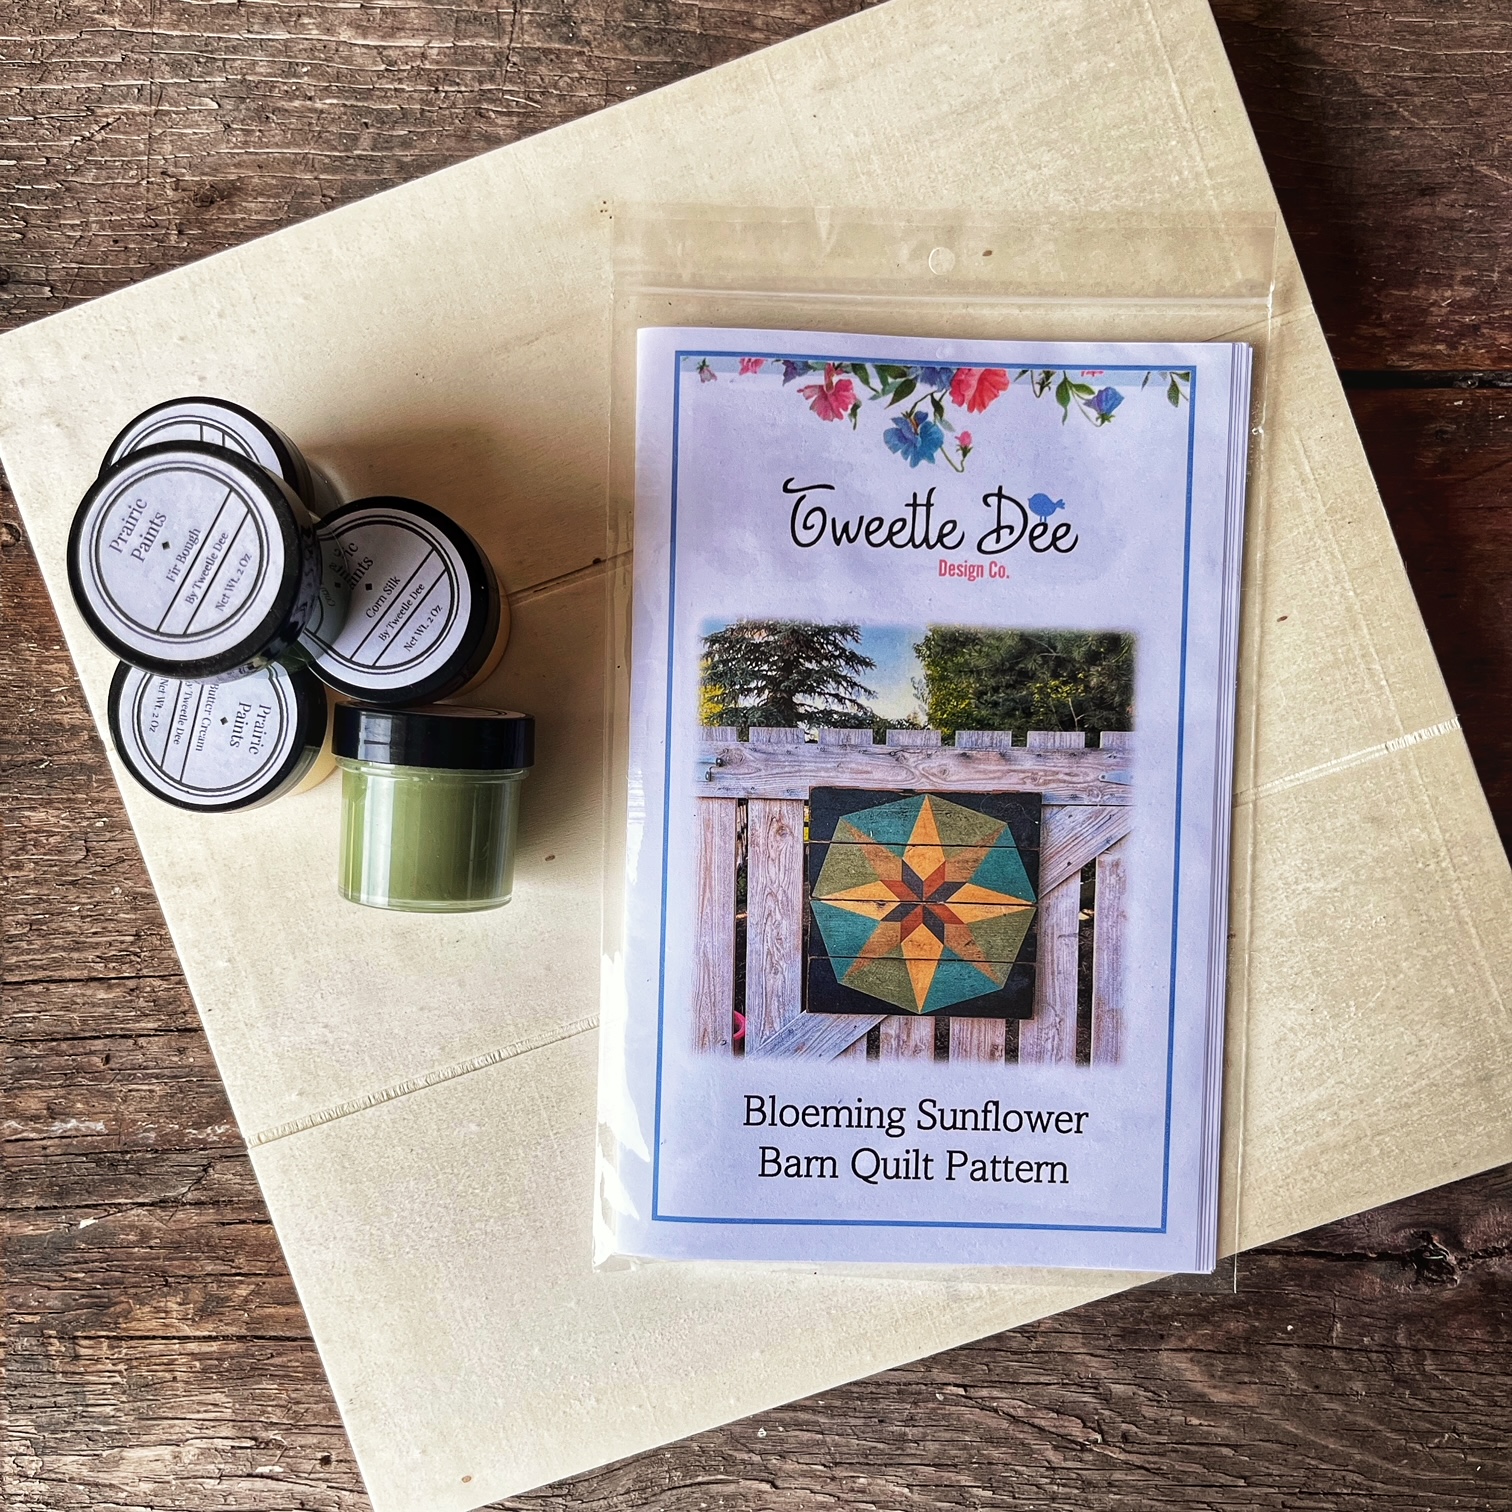
Bloeming Sunflower Barn Quilt Kit

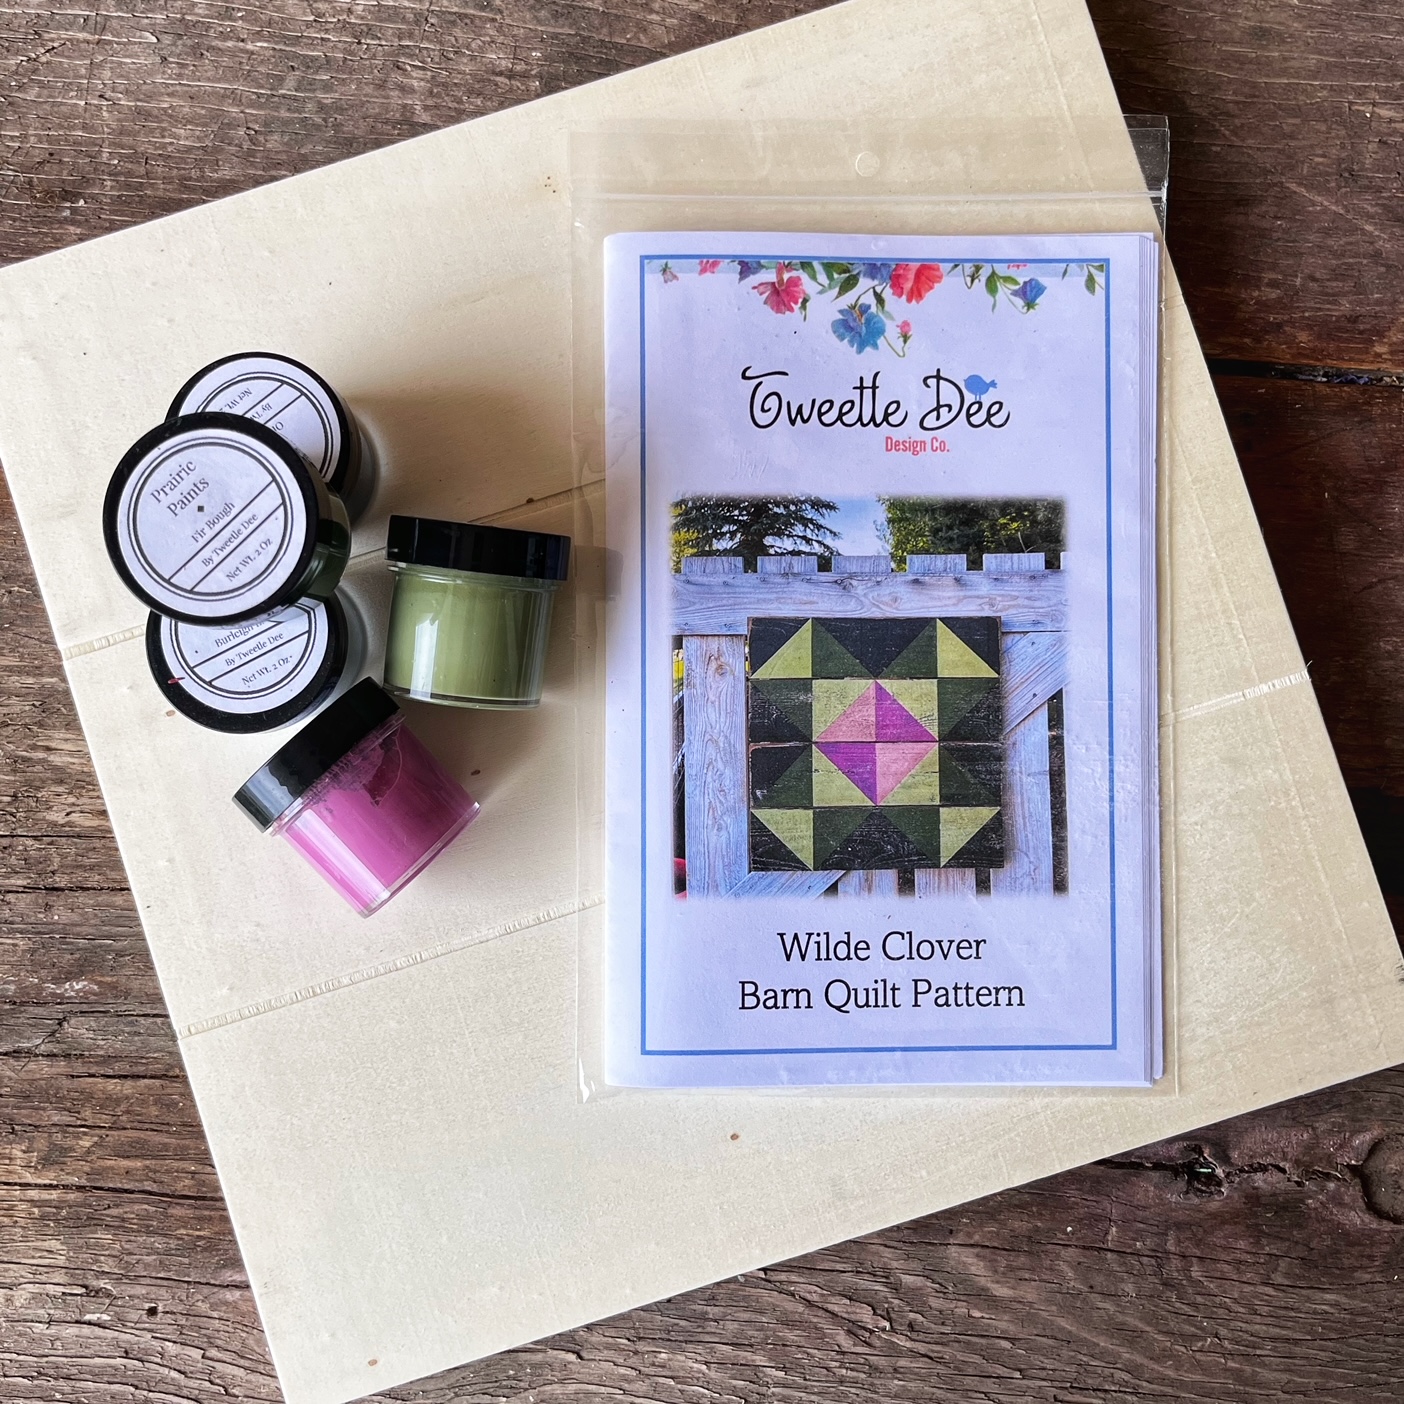
The Bloeming Sunflower and Wilde Clover Barn Quilt Kits include a Farmhouse Planked Barn Quilt Board, a pattern and our Prairie Paints to complete each of the barn quilt designs.  The barn quilt boards are 12" square and when painted in a set, make a beautiful piece of wall art, they are also pretty darling as individual quilts.


Bloeming Sunflower and Wilde Clover Barn Quilt Patterns

The Wilde Bloem Barn Quilt Patterns come in full color print that we can ship to you or in a PDF download that you can print yourself.  All of our 183 patterns can be found in Our Shop .  All of our pattern include a full color diagram of the barn quilt, a line pattern, Prairie Paint color selections, and our How To Paint a Barn Quilt instructions.  These patterns have been a reason to celebrate, dream and create for many DIY barn quilters and we hope these designs inspire you to paint one too!


Wilde Clover Mini Barn Quilt


Wilde Bloem Barn Quilt Kit

The Wilde Clover is the symbol of good luck, blessings and fortune and we loved painting this in our freshest Prairie Paint colors.  My favorite is the Alfalfa Bloom, which is the dark and vibrant pink.  Then again, two of my most loved greens are there beside it.  You will love painting with our own blend of gel-chalk paints which have superior coverage and vintage inspired colors you will love.

We hope you are inspired by this Wilde Bloem Collection and will find something to stitch, paint, quilt and love about these special flowers.  


Read more »

Thursday

Wildflower Pottery

The day our snow is melted we are out looking through the grasses and rocks on the mountain for the first peeks of those colorful blooms.  This year I wanted to preserve the first of the blooms with these farmhouse pottery slabs.  So, I went for a walk in the field to find a few beautiful flowers.  


They are so easy to make and so beautiful hung in a collection on a wall, or displayed with your favorite blooms.  It is also a great way to preserve special blooms from bridal bouquets and other special occasions.  You can make them tiny for a single petal or bud and wear as a necklace or you can make a big slab and recreate your garden in pottery.  There are no limits to the ways this technique can be used to bring lasting wild flowers into your home.


The materials are few and relatively inexpensive.  You will want Polymer Clay.   I have tried using Air Dry Clay and it is so temperamental and brittle, it is sad to loose your blooms to weak clay, so I clearly recommend using the Polymer Clay.  I love to use Sculpey Polymer Clay .  It comes in lots of colors and is so smooth and easy to work with.  The directions were straight on correct and my projects always turn out perfectly using their clay.  So get some!  Price point is anywhere from $2.50 to $9.00 for a pack which will make 3 to 4 floral pottery 
pieces.


The Polymer Clay comes out hard like a brick.  You will want to break off a piece and knead it in your hands until it gets soft and workable.  Polymer Clay is made of plastic PVC material and softens as it is worked.  So kneads a piece and roll it out to be a 1/4 inch thick.  I like my edges to look like a slap of clay and not perfectly cut.  You can cut your shapes and edges with a knife, but again I love the natural look of rounded fingered shapes.  Use a toothpick or dowel to make a hole in the top to hang it from and place on a non-stick baking pan.


If you are wanting a relief of a flower, lay it down on the clay where you want it to mold and lightly roll over it with a rolling pin to make the indenture.  Lift the flower off of the clay and bake at 275 degrees for 15 minutes.  


If you want to preserve fresh wildflowers with all their color, pick blooms that are soft and will flatten well.  Lay your blooms onto the clay in the place you want them to be and roll over to flatten them into the clay.   Use tweezers to position any petals that are out of place and tap lightly into the clay.  Pick off any that are standing upright and will not lay down.  Heat your oven to 275 degrees and bake for 20 minuets.


The baking process will dry out the flowers and the colors will dull just a bit, but the sealer will refresh them in the next process.  Let the clay cool.


Use your finger to lightly brush off any loose petal crumbs or leaves that popped up during the baking/drying process.


To seal your wildflowers, lightly brush over the baked flowers and clay background with the Sculpey Satin Glaze.  This liquid is the same component as the Polymer Clay but without the fillers, so just as the Polymer Clay dried hard, this satin glaze dries clear and hard over your clay piece to seal in the petals and other parts that may not have laid perfectly flat.  

After you have lightly brushed this over your clay piece, return it to the over for 5 to 10 minutes to bake it clear.  Watch closely as you can over bake it and turn your piece brown...(I know).    Bring it out of the oven and let cool.  

Use the tip of a needle or other tiny sharp object to clear the hole back out and your DIY Wild Flower Pottery piece is ready to hang! 


If you are looking for suppliers of the Sculpey products, I found mine at my local Hobby Lobby.  I hope you enjoy this DIY project!  It is one of my favorite of all time.  I know I say that often, but for real, this was so easy and relatively quick to make.  


Read more »

Tuesday

A Good Place

The Thistle is a flower with special meaning to my family in New York.  I grew up hearing how the land the farm was built on was chosen by a blind, many greats grandfather named Conrad Lasher.  He traveled to Steuben County with family who were commenting on how big and tall the thistles were growing on the prospective land. 


He asked to feel them and was led to the field and said after touching the purple flowers, "Any land that can grow Thistles this tall, is good land".  They bought the farm and the woods and it all grew, just like the Wild Thistles.  

Today I had a long walk through the farm fields along the river near my home that is 2000+ miles away from the family farm in NY.  The rainy summer we have had, with it's afternoon thunderstorms has reminded me of my NY summers.  As I came around the long stretch of waving fields, there was one very tall and beautiful Thistle.  Behind it, the mountain we love on. 


I walked past the pink flower and then turned around to go back and take a picture.  As I looked through the lens I saw this one lone thistle plant and our home behind it.  I paused and took a deep breath in.  One of those that you remember always and then as I was heading home I looked to my left and saw the two tall blue Harvestor silos across the river and field.  


On our farm in New York were two Harvestor's just like the two in the field in front of me.  I walk this trail several times a week and they are a landmark for me, reminding me of home.  The rain, the thistle and the silos all combined this morning to bring a little bit of my NY home to me in Utah.  

The message I took in is just like my Greats Grandfather Lasher said, a couple hundred years ago, "Any land that can grow Thistles that tall is good land." and so this land that we have made our home is "good land" too.   It's all good when we receive it, with a heart willing to love it and share it.  

So, this was my Celebrate, Dream Create moment for the week.  Maybe, there will be a few more.  I celebrate the words of the past and the experiences I had growing up that made me fall in love with the peace only nature can bring, and the home we have grown into.  It took a weed to symbolize the dream and hope of growth.  That is a message to think about too this week.  

I hope you have a wonderful week ahead full of things to celebrate, hope for and lots of creating.  


Read more »

Wednesday

Boho Rag Flags

Happy Flag Day!  It's time for the red, white, & blue or Purple, gold, green & a whole lot of vintage yumminess!  You all know how much I love my florals and old lace, so when I was asked to create something for the summer holidays, I had to combine the two and create a Vintage Inspired DIY Flag.  


They are so colorful and rich with texture that I plan to keep mine up year round...well, maybe down at Christmas, but you get my passion.  These are simple to make because they are sew-free, meaning everything is glued.  To complete this project you will need.

Materials 

 Wood Dowel
Base Fabric (burlap or muslin)
Fabric Glue or Low-Temp Hot Glue
Scraps of Fabric, Lace, Trim, etc.
Twine
Sponge Stencil Brush
Star Stencil
Deco Art Vintage Wash Paint
Scissors

I am leaving the size of dowel and yardage of fabric/trims off of the material list because the amounts will vary depending on the size you are wanting to make.  To make the smaller Boho-Vintage Flag at the top of this post you will want a half yard of base fabric and fabric and trim that is a half yard or so in length.  To make the Red, White and Blue Vintage Flag I used one and a half yard of base fabric and fabric and trim that was a yard and a half long.


Instructions

1.  Cut your dowel to the desired width you want your flag to be plus four inches.  Stain it a desired color or you can paint it, or leave it plain.  All three options look great.

2.  Cut your background fabric into a long rectangle the width of your dowel minus four inches.  I hope that isn't too complicated.  You want to make sure your background fabric rectangle isn't larger than your dowel.  The smaller Boho Vintage Flag was 24" wide and 44" inches long.  

3.  Lay the background fabric on a flat surface and fold the top down two inches to create a sleeve for the dowel to go through.  Once you have folded it over, use the hot glue or fabric glue to secure the edge down.  Let dry.


4.  Turn the background fabric right side up with the sleeve to the back.  Cut a piece of smaller rectangle to create the Field of Stars.  To get the measurement, take half the width of your flag for the width of the "field" piece and the length would be figured at a third of the length of your background flag piece.  You are creating another long-ish rectangle for the stars.

5.  Using glue, attach the top of the Field of Stars piece to the top of the background fabric.  I positioned mine about an inch and a half below the top to allow space for extra trim and for the background fabric to show.  Because these are Vintage "Inspried" Flags and not a perfect correct replica of the American Flag, I positioned my Field of Stars on the right side of the background piece.  If you want to create a replica that matches the American Flag in perfect correctness, you will want to position your Field of Stars on the upper left side.  My flags hang at an angle to look like the flag is draped, and I was not concerned about the Field of Stars being on the left.  It is totally your choice which side you place them on.  Glue the outer edge down as well.  Leave the bottom and the left side unglued for now.


6.  After the Field of Star piece is attached on the outer and top side, it is time to add the layers of fabric and trims.  Cut a piece about two inches wide and as long as your background piece.  Using glue, attach it at the top just under the inner side of the Field of Star piece.  Then glue the strip to the background piece just to the end of the Field of Star piece.  You want your strips of fabric to wave free, so only attach this first piece to the corner of the Field of Stars.  Layer the Field of Star piece over the first strip and glue down in place.

7.  Cut another piece of fabric two inches wide and glue it only to the top of the flag aligned with the Field of Star piece and the first strip.  Repeat this all the way across.  I like to leave the edge of the background fabric showing about a half inch.  As you are layering fabric, you can overlap trims and fringe over pieces glued down to create a luscious layered look.  A few pieces of mine were purposefully pieced together using a tiny amount of glue to give it even more of a scrappy look.


8.  After you have gone across the top, position the smaller pieces under the bottom of the Field of Star piece and glue the Field of Star Piece down to the strips of fabric once you have the fabric strips glued down.  

9.  Now that your flag is filled in with strips of fabric, you can glue old lace trims around the Field of Stars to finish off the edge.  I love to layer trims and lace, so have fun choosing a look to finish it off.  Glue the pieces down and let dry.

10.  Once the trims dry, take a pair of scissors and cut the background piece up to the top and the the top of the Field of Stars piece going in between the strips of fabric.  This gives you a layered look to your flag.  Trust me, you are going to love it waving.  After I cut the strips I frayed the edges of the background pieces to give it a worn look.  I did this by running my fingers across the edge and pulling threads to create a frayed look.  It's easy!


11.  To create the stars I used the Deco Art Vintage Effect Wash Paint, a sponge stencil brush and a star stencil.  I couldn't find a star stencil to match the size I wanted, so I took a wood cout out of a star I liked, traced it onto cardstock paper and trimmed the inside of the star shape with a knife to create the perfect star stencil.  I used a minimal amount of Vintage Effect Wash and lightly tapped the sponge stencil brush over the shape stencil to create a faded star look.  

I love the Vintage Effect Wash Paint from Deco Art!  It works as a paint, a stain, or a wash depending on how many layers you add.  For other ideas on how to use this amazing paint go to their site Deco Art!

12.  Let your paint dry and then all you have left to do is tie a string to both ends of the wood dowel to create a hanger.  Seriously,  wasn't that so easy?


If you love the traditional Red, White & Blue you can find a little inspiration below.  I used ribbon, lace strips, trims, burlap, and fabric to create this huge front porch flag.  Instead of gluing the pieces together I added a couple of "pieced" pieces to it by tying a knot in two different fabrics.  I love the shabby vintage look of it.  Be sure to tie off any trims to the end of the flag at the dowel for extra oomph!


I hope this project has inspired you to look through your stash of fabric and create a flag for your summer and beyond.   If you would like to watch a tutorial for the Vintage Inspired DIY Flags, you can go to KUTV Fresh Living and see us make the Boho version on air.  It will be so fun!

If you are wanting to purchase a flag already made for you, both versions of the flag will be up in My Shop for pre-order this week.  Ship dates the first week of June.  There will be limited quantity so when they are gone, they will be gone.  Go ahead and get your pre-order in.  

As always, keep Celebrating, Dreaming and Creating something magical in your life.  xo


Read more »

Printfriendly