Wednesday

Spring is Here


We had such a happy weekend with the first signs of spring coming up on the mountain.  Easter is one of my favorite holidays because of how simple it is.  A few eggs, a few flowers, a cute bunny and the remembrance that our Savior died so that we can live and have second chances.  It is a perfect time to clear out the old and look at the fresh gifts we receive in our renewals.  

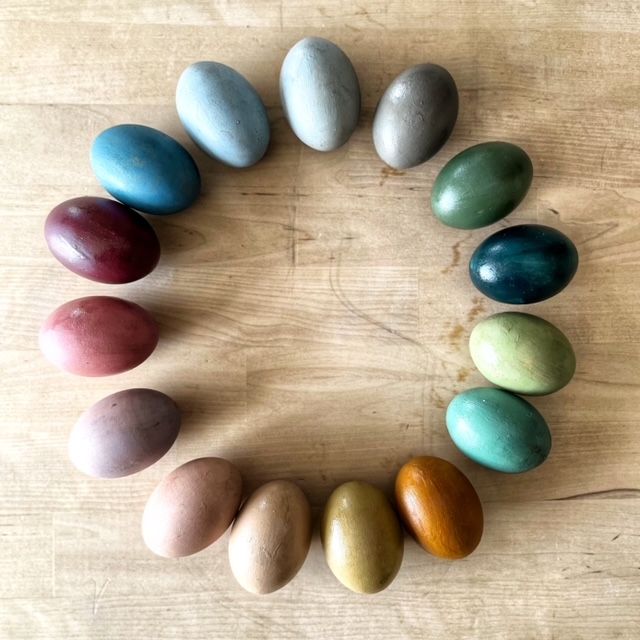
I painted a few wooden eggs with my favorite Prairie Paint colors, that looks so much like the natural eggs we find in our chicken coop.  It's inspired me to pull together a sampler pack of our colors for the season.  Watch for it come very soon.  


I finished the Bud and Dot patterns and created a couple of kits for them, and of course our darling bunnies wanted to show them off.  The kits are available in Our Shop with all the fabric, floss, hoop, needle and instructions to make these darling bunnies.  They are so cute you will want them all around year round.  


All of my ceramic bunnies became a collection of dark chocolate bunnies with a couple of coats of Espresso Brown Satin Spray Paint.  I gathered them together with some vintage Easter cards and Prairie Paint eggs.  It was quick and easy and was the perfect look for my spring table.   


The snow melted off just enough that we could have a small egg hunt on the lawn and the back patio and we all soaked up the rich, golden sun.  It was a lovely day to be together and help our two toddler grandbabies find their eggs.  It took a little wrangling to get them to put them in their baskets, but it was a really fun time.  


As soon as that sun was setting we lit up the porch lights and made our Sourdough Pizza Dough and fired up the Ooni.  We love having pizzas on the back porch because of how simple it is to prep for and each person can make their own creation.  My husband runs the oven and we had a great dinner as the sun set.  

One thing I have learned  is that it doesn't matter what the menu is, or what the weather is, or how many or few we have, as long as we gather together, we will feel love.  I'm thankful for the blessing of family and friends.  I'm also so thankful to see the sun shine on our fences, knowing that the snow will melt and new growth will come soon.  

We hope you had a wonderful weekend and enjoy all the little things that this season brings into your life.  Remember that everyday there is something to celebrate, something we can dream about & hope for, and something we can create.  It's the way I have survived and thrived in my life and I know there is something magical when we look for the small things we can celebrate and feel gratitude for, something we can dream-or hope for, and something we make with our hands and hearts everyday.  

Sending you a hug for a great week!


Read more »

Monday

Sweet & Light Sourdough Cinnamon Rolls

Every spring we make cinnamon rolls for your family.  It's been a tradition for 30+ years with the scent of sweet dough and cinnamon that brings you home.  This year with the a new sourdough journey, we made a smaller sourdough batch of rolls with many of the tricks we've learned over the years, and they were the best we've ever made!  So I though with Easter coming this week, it may be nice for you to try them as well.  


Sweet & Light Sourdough Cinnamon Rolls
Ingredients

Dough
140 grams milk
28 g melted butter
1 egg
100 grams active sourdough starter
300 grams flour
5 grams grey salt

Cinnamon Filling
2 tbs soft butter
1/2 c sugar
2 teas cinnamon
1/2 c brown sugar

Glaze
1/4 c soft butter
1/4 c soft cream cheese
1 teas vanilla
3 c powdered sugar
1 to 2 tbs of milk


First, let's make the dough.  Pour the milk and butter into a small bowl, whisk and set aside.  In your stand mixer bowl, add egg, active sourdough starter and with the paddle attachment mix together.  Add the butter/milk mixture until incorporated.  Add flour and salt.  Mix into a sticky mixture, cover with plastic wrap and let rest for 30 minutes in 68 to 75 degree temps.  I like to turn on the light in my oven and proof my dough in the oven with the door closed.  This is especially helpful in the winter. 

Change the mixing attachment to the dough hook and knead the dough for 5 minutes on a low speed.  If the dough is too sticky while kneading, add a little more flour until the dough forms a soft ball.  Butter the sides of a large bowl and place the dough in it, cover with plastic wrap and place in a warm (68 to 75 degree) place to proof for 12 hours or overnight.


When the dough has proofed and it should be doubled in size.  Oil and flour your counter surface and lightly pull the dough from the bowl onto the prepared counter space.  Let rest 20 minutes.  This is a good time to make the Cinnamon filling.  

In a small bowl add white sugar and cinnamon and whisk together with a fork.  get your brown sugar and soft butter ready.  Prepare a 9" springform pan by placing a piece of parchment paper in the bottom and up the sides of the pan.  Set aside. 

Lightly roll out the dough into a 16" x 12" rectangle om the oiled and flour counter.  I like to make a few soft rolls with my rolling pin and then use my fingers to stretch it into shape lifting and lightly pulling it into shape.  Once you have the shape, spread the softened butter over the dough.  Sprinkle the cinnamon sugar mixture onto the butter and then sprinkle the brown sugar over it all.  


Now it's time to make your rolls.  Take the long side of the dough and roll it from one side to the other to make a long tube of dough.  Using a piece of baker's string, slice 2" rolls by sliding the string under the roll, and then crossing the two ends of the string to cut off each section.  

Place each roll into the parchment lined pan.  Make sure to give them some space.  
When all of them are in the pan, use your fingers to lightly press each roll down a little to make them more round than upright.  Cover the pan and let rise for 2 hours in a warm place.  


When the 2 hours are up, preheat oven to 350 degrees and place in middle rack of the oven.  Bake for 25 to 30 minutes or until the tops are slightly brown. Remove from oven and let sit in pan for 10 minutes before lifting the parchment paper out of the pan to cool on a rack.  


While they are cooling, it is a good time to make the glaze.  In your mixer and with the whisk attachment, add the butter and cream cheese and whip on high for a few  minutes.  Add vanilla and mix.  Add the powdered sugar and whisk.  It will look dry,  add the milk a little at a time until you get the consistency of a light whipped frosting.  

You can either frost while warm and have the glaze sink in or frost cold and pile that yumminess up.  We love to serve these slightly warm.

We hope you enjoy these Sweet & Light Sourdough Cinnamon Rolls.  They turned out so sweet and good.  The slight tang of sourdough set off the sweetness and made for a perfect bite of cinnamon goodness.  To watch the video you can go to our Unstagram @tweetledeedesignco or our TikTok channel @tweetledee.


Read more »

Strawberry Vanilla Bean Jam

There are few things that taste more like spring than fresh strawberry jam.  I've made my own jams since I was a young momma because they were so easy to make, and always tasted amazing on fresh bread.  The two things I would make when I needed a lift, bread and jam!  Well, if you have followed me long, you know I've been on a Sourdough bread journey since January and when the last batch was proofing, I opened my fridge and took out two baskets of strawberries, and go to washing. 


It was just two baskets of store bought berries, and it took less than 10 minutes to wash and lop off the green leaves, quarter and place in a medium stockpot.  I added a cup of water and two cups of sugar, turned on the heat to medium high and gave them a stir. 


Just look how bright they are.  After they were cooking for a few minutes, I thought about the Vanilla Sugar I made a in January and wondered how adding fresh vanilla sugar and a bean or two would make the strawberries taste.  Curiosity always wins, right?  


I opened the jar of Vanilla Sugar and felt like I was floating, it was so fragrant and light.  I added a cup of the vanilla sugar to the pot and pulled out two vanilla beans.   To make your own Vanilla Sugar take some real vanilla beans and press down the down into the center of a jar of granulated sugar, top with a lid and store for 6 to 8 weeks.  It's the perfect way to have a little extra vanilla in anything you use sugar with.  

The pot of strawberries kept at a low boil for about 20 minutes.  Meanwhile I stirred it a few times and watched it thicken slightly.  After 20 minutes, I took it off the heat and poured it into a jar and placed it in the refrigerator to cool.  

As it cools, it thickened to jam consistency and I got my sourdough out to slice and toast.  I couldn't wait, and called Mike in from the shop to enjoy a yum moment with me.  He loves warm, fresh sourdough as much as I do and even more, homemade jam.  I didn't tell him that the it was infused with real vanilla.  


We both were shocked at how amazing this jam was with that little hint of vanilla.  It was the best we have ever had.  In the past few weeks we have been enjoying it on sourdough toast with a shear of ricotta cheese and a spoonful of the Strawberry Vanilla Bean Jam.  We've shared it with friends for late night desert and one of them, said it tastes like a cheese cake.  I agree!  It is amazing.  

To recap this simple recipe...

Strawberry Vanilla Bean Jam

2 Quarts of Fresh Strawberries
2 Cups Granulated Sugar
1 Cup of Water
1 Cup of Vanilla Sugar
2 Whole Vanilla Beans

Place cleaned, hulled and sliced strawberries in a medium sauce pan on medium heat.  Add water, sugar, vanilla sugar and vanilla beans and heat, stirring occasionally for 20 to 30 minutes.  Take off heat and let cool.  Pour into jars and place in refrigerator with lid to cool completely.  Jam will thicken more as it cools.  

Jam will keep for 2 weeks in fridge or 3 months in freezer.

I hope you enjoy this little change up in your Strawberry Jam experience.  Add the vanilla and turn every bite in spring heaven on toast.  xo


Read more »

Friday

Flora Angels

Angels Among Us was one of our very first collaborations when I married my husband and learned that he knew how to use tools.  I had been designing and stitching angels for the years that I was a single mom, stitching in the evenings after work at the mortgage company.  In fact, my very fist embroidery pattern that sold was a garden angel with the saying Whatsoever Ye Sow, So Shall Ye Reap.  I think I needed all the angels I could keep around me.  


After our angels were published in several national publications and shared on a few home networks, we set them aside for other projects.  These sweet angels keep making their way back to our worktables and now we have added our Flora Angel to the collection of angels in our online shop.


Our Flora Angel is a sweet minimalist angel made from wood and wire.  Her cedar wood basket is stained and filled with bright wool flowers to welcome the garden's most beautiful guests.  


This year, we have also added the option to purchase kits to make your own Flora Angel.  The kits include the wood cut out pieces, wire for the halo and basket handle, and wool to make your own flowers for her basket.  We are so excited to offer these kits so that you can create a little joy for yourself in making your own angel.  It's like sharing the creative happiness with you!


Today I will be filming a tutorial for how to make a Flora Angel from our kit as well as how to make the felt flowers in her basket.  You will be able to find the video on our Tweetle Dee YouTube Channel.  We hope you enjoy making these beautiful angels with us.  They are the sweetest and so are you!  Have a wonderful day.  


Read more »

Thursday

Indian Paint Brush Wilde Bloem Embroidery

Of all the flowers that grow in the wild, the Indian Paintbrush makes my heart jump every time I'm blessed to find one.  This wild flower grows in the west among  dry, rocky soil and is found in the wild fields in the east, both places I have called home in my life.  It symbolizes the Wayfinder or following your own path, which is my "word" and has a deep connection to my soul.  


Wild Bloem Indian Paintbrush Embroidery 

This month we painted the Indian Paintbrush Barn Quilt as part of the Wild Bloem Collection, our 2023 Block of the Month.  I am more in love with this collection of wildflowers everyday as I stitch and paint these 9 wildflowers and of course the Wild Bloem Bee.  


There is something so vintage about simple embroidery done on black and our Wild Bloem embroidery florals are stunning stitched alone or in the Wild Bloem Hoop.  This week we released the WB Indian Paintbrush Embroidery Kit so that you can stitch along with me on Instagram @tweetledeedesignco or our Tweetle Dee YouTube Channel.


Wild Bloem Indian Paintbrush Embroidery Kit

The kit includes the Indian Paintbrush Embroidery Pattern, fabric, hoop, thread, needle, and scissors to make your own Wayfinder.  The frames are also sold in the shop.  We hope you join us this year as we paint, quilt and embroider the Wilde Bloem Collection.  It was designed from the heart and I know you will feel the love with each of these beautiful florals.  


Read more »

Mountain Maple Syrup

At the end of the winter season as the days get longer and the temps get a tad bit warmer, the sap in the maples begins to run.  One of my most fond childhood memories was walking the woods to check maple sap buckets with my Grandpa Lyke.  He would sneak a little cup for me and let me drink the sap and with a twinkle in his eye, remind me not to tell Grandma. 


Our First Maple Syrup Bucket

I didn't understand how valuable that clear sap was until now.  Our community in Woodland Hills, Utah is experimenting with tapping the Bigtooth Maples on our mountain to make maple syrup.  A few families have been doing it the past couple of years, and we had the pleasure of watching their operation.  So, Mike and I decided to try making some from the trees in our yard.  


Grandpa and Grandma Lyke Hugging a Very Old Maple in the Woods

Our first step was to identify the Maples on our 1 acre property.  We found four and a few little ones trying to grow in the Scrub Oak Stands.  The two biggest are two of the prettiest in our back yard, near the chicken coops.  When we moved here 13 years ago, they were just tiny things, but every year they get a little taller and their leaves turn flaming red.   I have photographed them every year in the fall and hope someday to replicate my grandparent's picture with my sweetheart. 


The Sugar Shack

A few years ago we visited the Sugar Shack down in the woods on the farm that my cousin and her family live on and got to see all the old Maple syrup making equipment as well as the new processes they began using to harvest the sap from the many, many trees in the NY woods around the farm.  I loved the patina on the old metal buckets and remember watching the sap drip out of the metal taps.  I know that the tubes and modern systems are way more efficient than the old ways, but for our little experiment and four trees, I ordered taps and buckets that looked like the old ones from the farm.   


The Tallest Bigtooth Maple Tree in our Yard

We have had a long and cold winter, so it took a little work to get out to the trees, but Mike was as excited as me to try making some syrup the old way.  Four taps, four buckets and four trees.  It has been a few weeks, and we have collected about five gallons of sap.  It's not much, but it is enough to start.


Maple Sap Boiling on the Stove

After filtering the sap to get out any "things", we got a huge pot and began the boiling process.  My Grandma sent me pictures years ago of the Maple burning party they had a long time ago.  I'll have to find them and share them with you.  Their were a lot of family around a big metal vat with wood fire burning under it.  Lots of kids and family with smiles.  

As we watched the sap boil on my stove, it made the air in our home smell sweet, and it brought all the memories back from my childhood.  Grandpa at the stove frying Fritters to dip in the dark syrup.  All of us littles would stuff our cheeks full of the fluffy pasties soaked in syrup and laugh and smile along with the old ones.  I love those memories of all of us together in that kitchen.  


Our First Bottle of Maple Syrup

Today, we bottled our first little bottle of Maple Syrup from our home on the mountain.  It took four gallons to get two of these bottles.  It was so sweet and good.  I licked the spoon, not daring to take a whole spoonful all to myself.  I'll save it for a special day when our grandbabies and children come home and we make Grandpa's Fritters (recipe in blog archive) for them all to enjoy together.  

If you follow me on Instagram, I will make a highlight bubble for the syrup making stuff and where we got our things.  I'll post the old pics as I find them, and the new ones of our family too.  I'm so happy for the four little trees on our property and the sweet fun we've had doing something new together.  It's was for sure a moment to celebrate!


Read more »

Sunday

Castle Creek Furniture

Farmhouse furniture has been trending for a few years now, typically with white on white with minimal wood finishes.  Though the  exterior of the old farmhouse I grew up in was white with black shutters, the interior rooms were full of color.  The rooms all had wood, marble, crystal, and colored glass and furniture in the home had a story to tell.  

I've had this little breakfast table in my kitchen for many years, all white with white chairs, until this past week when I decided to paint it in one of my favorite Prairie Paint  colors, Castle Creek.


The inspiration for this deep green came from the colors I remember in an area of the woods adjacent to the family farm, aka The Woods.  After a hike over the corn field hill, through the woods, and along the slate gorge, you come to a small pond called Castle Creek.  It is surrounded by towering trees and vines, moss and a green field with an aged fishing shack complete with a little covered porch.  


On a recent visit to our local antique shop we found a set of black chairs from the 1870's for $100.  That find was the push I needed to paint my table dark, and I knew the best of our greens was Castle Creek.  So, we took our white chairs to the ReStore and dropped them off to go to another family and picked up our new antique chairs, threw a tarp down and sanded the top and rough spots of our white table. 


Then one coat with a furniture paint roller and a brush for the curvy parts, we let it dry and then added two more for good measure.  Let dry and then added a coat of our Prairie Paint Finishing Wax.


Our Prairie Paints Finishing Wax is made of bees wax and compounds that add  richness to our gel-chalk Prairie Paints and seal the wood and paint for years of beauty and use. 


We let it dry and then a light wipe of a soft cloth and it was ready to place these beautiful black chairs around our deeply moody breakfast table.  Putting them all together it was clear that they had belonged together all along, like two peas in a pod.  

The Prairie Paints we used were Castle Creek, and the finish is the Prairie Paints Finishing Wax.  Both of these are available on Our Shop.  We hope that this post inspires you to add a little color to your farmhouse.  We love ours and know that you will too.  


Read more »

Wednesday

Wilde Bloem Barn Quilt Collection

Our newest collection is so close to my heart and I am beyond excited to begin the introduction of Wilde Bloem.  With whispers from the meadows surrounding our beautiful farms, each block is a flower with a message.  We are so happy to focus on one flower and message the next nine months of 2023.  Introducing Wilde Bloem which translated in Dutch is Wildflower.


Wilde Bloem Barn Quilt Collection

Nine florals, a gathering vine and two adorable quilted bees come as kits to paint, sew or embroider together.  As we discussed which of our favorite wildflowers to add, and create quilt blocks for, we choose those that had messages of hope, belonging, community.  We hope you will join us this year to create Wilde Bloem meadows all over the country.


Wilde Bloem Bee Barn Quilt

In addition to the Wilde Bloem Barn Quilt Collection we will add individual blocks of these original designs for purchase to those who want them in larger sizes for outdoor sharing.   The first this month is the Wilde Bloem Bee Barn Quilt.  This singular bee was designed with beautiful wings to give flight and light.  The points of the stars shine in it's wings.  I am so very in love with this bee and I know my bee loving friends will be too.  It is available for order in five large sizes.  


You can find the growing collection of Wilde Bloem by going to The Shop.  The kits will include everything you need to paint a darling 12" Bloem Barn Quilt. We hope you will join us in celebrating, dream and creating a beautiful Wilde Bloem meadow of your own this year.  


Read more »

Monday

Farmhouse Nesting Benches

One of my most loved pieces of furniture in my home is my collection of Farmhouse Nesting Benches.  I use them for seating, tables, bookshelves and planting towers.  I have stained and painted so many of them over the years and can never have enough of them.  We wanted to bring them to our online shop this spring and I am so happy with the style we came up with to make these available for you.  


Farmhouse Nesting Benches


We have two sizes that fit perfectly together.  Each come sanded smooth, with pre-drilled holes and hardware to assemble.  They are unfinished, ready to paint or stain.  They ship flat to save shipping costs for you and are super easy to put together.  


They are beautiful unfinished too, very Scandinavian in style and look.  If you want to watch me assemble and paint one watch my Instagram Stories this week.  We are hoping for snow to melt and to begin assembling our big greenhouse.  These Farmhouse Nesting Benches will be lining the garden and table in it soon.  


Read more »

Friday

Prairie Petals Barn Quilt

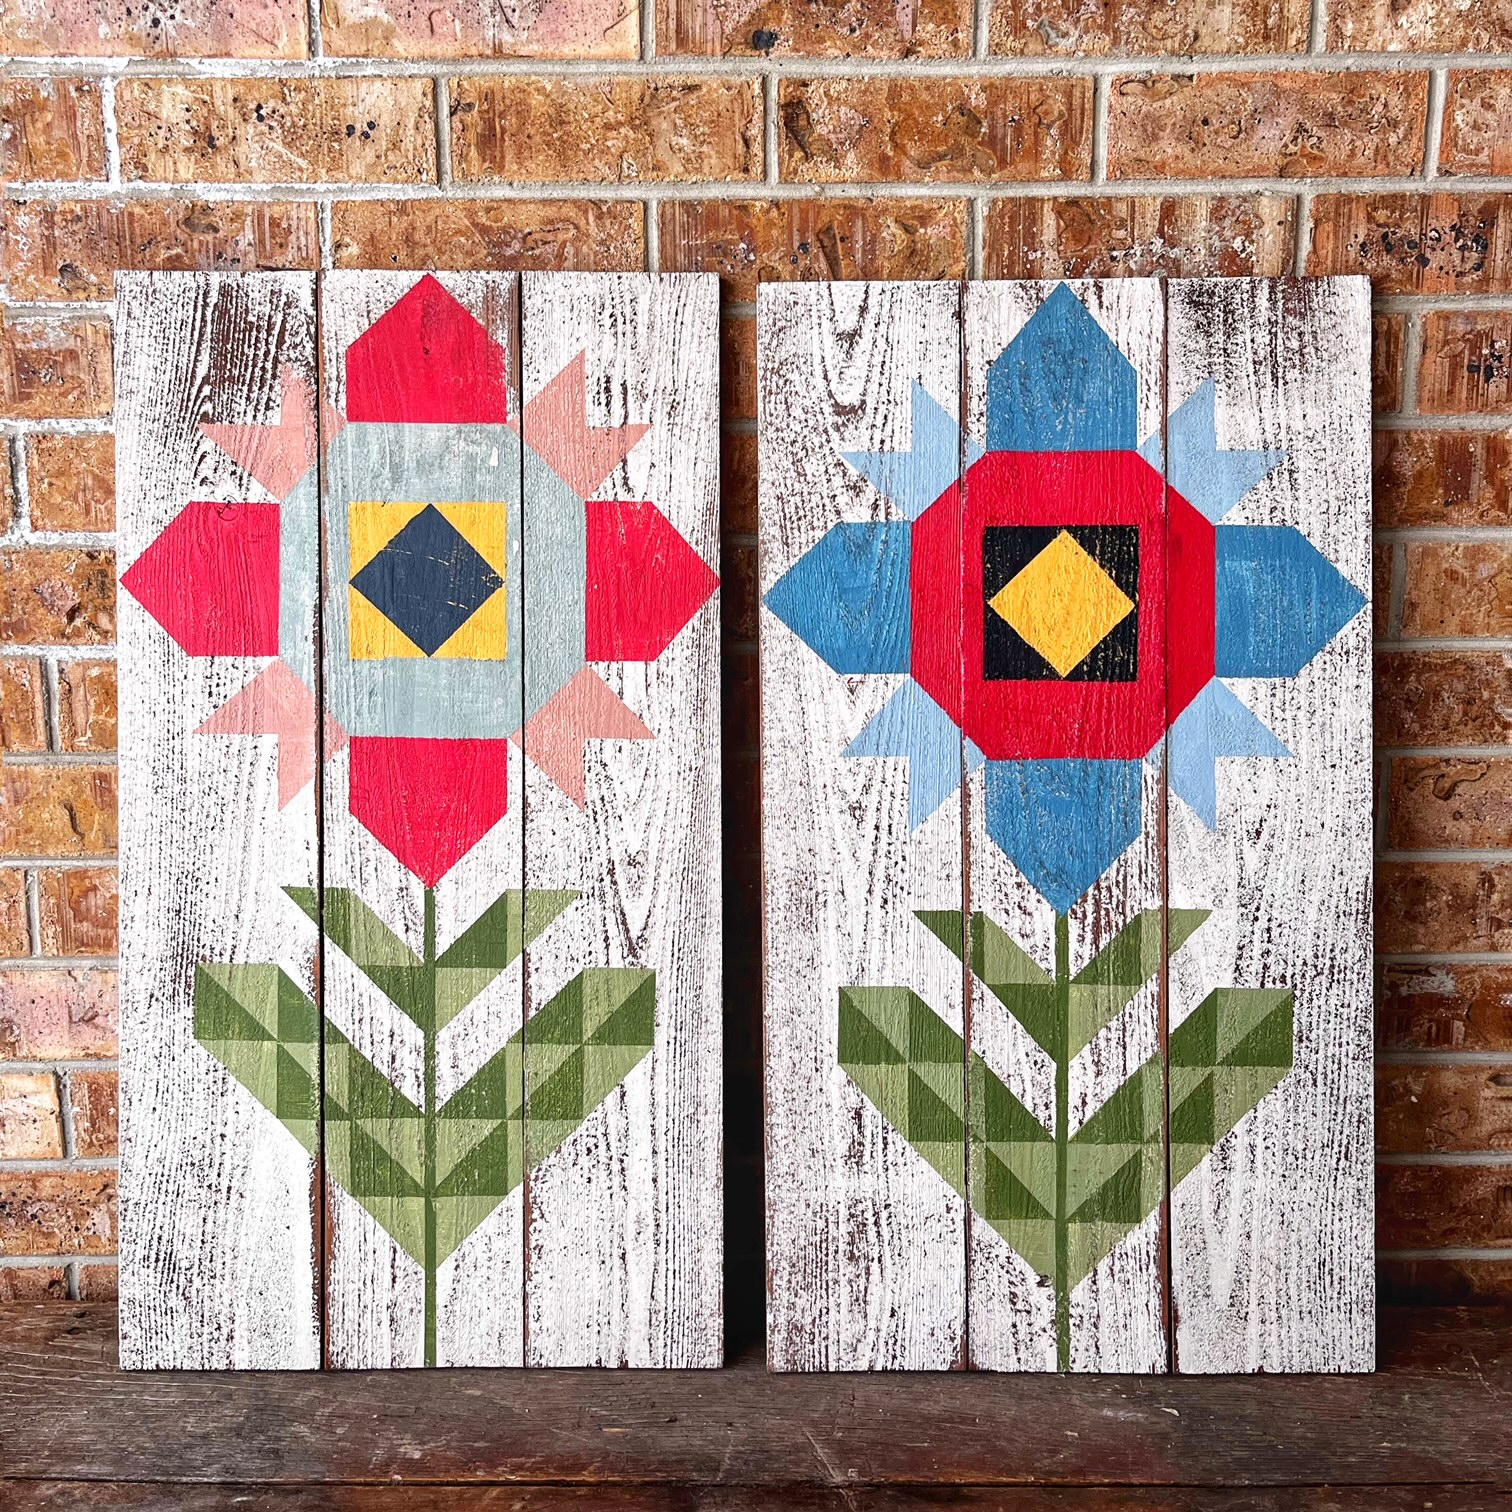
The long months of winter are almost past, and with new sunshine comes the growth of new life in vibrant color.  We just couldn't wait any longer to release a few of these painted flowers to bring a whisper to spring to your heart.  Prairie Petals is now available in our shop in painted barn quilts, kits and patterns.


Designed with the whimsical folk style that we love so much, and hand painted on very old reclaimed wood.  I am so excited to see these finished and to see so much of the dark wood come up during the finishing.  I know the two samples I painted will be perfect on our greenhouse this spring.  


Prairie Petal Barn Quilts measure 16.5" x 3o" and are available to order already painted in custom colors from our Prairie Paint Collection.  I'm already dreaming of all the combinations that can be painted using our 64 vintage inspired colors and don't be surprised is a little bee shows up amid these petals soon!


We also have made these into kits so you can paint your own garden of Prairie Petals.  Our kits include the board, pattern and paints.  If you have a ton of wood and want to order just a pattern, you will love our color patterns with instructions on how to paint a barn quilt, color diagrams, paint lists and all the helps you need to be adventurous in painting these darling barn quilts. 


This week use code Petals20 to save 20% on all orders.  We hope to see a field of these gorgeous folk art Prairie Petals all across the country by summer.  xoxo


Read more »

Printfriendly