Monday

Chocolate Chip Ice Cream Sandwiches

Oh heavens, it's National Ice Cream month and we had to celebrate with a birthday last night by making our family's Chocolate Chip recipe and a big scoop of ice cream!  This cookie recipe has been passed down in our family and is my go to when I need to make either a ton of cookies or really large ones.  It has this magical quality of being perfectly firm on the outside and soft on the inside...and they never fall apart!  They are the perfect cookies for placing a big scoop of your favorite ice cream on!!!


Lyke Family Chocolate Chip Cookies

2 cups butter
2 cups white sugar
2 cups packed brown sugar
4 eggs
2 tsp. vanilla extract
5 cups oats
4 cups all-purpose flour
2 tsp. salt
2 tbl. baking powder
2 tbl. baking soda
4 cups semi-sweet chocolate chips
1 8 oz. chocolate candy bar, grated
3 cups of chopped nuts (optional)


Preheat oven to 375 degrees.  Cream butter with sugars.  Add eggs and vanilla to mixture and beat well.  Grind oats in blender until powdery.  Stir in flour, oats, salt, baking powder and soda into batter gradually.  Add chocolate chips and grated chocolate into batter.  Add nuts if desired.  

Form batter into golf ball-sized balls and place 2 inches apart on parchment or Silpat lined baking sheet.  Bake for 12 minuets.   Take out of oven and let rest on hot tray until cooled.  

You can make these ahead and place the ice cream in between the cookies and place in the freezer until it's time to serve them.  This recipe made about 24 ice cream sandwiches!  Seriously...it was the best for a summer birthday night in the garden.


Read more »

Friday

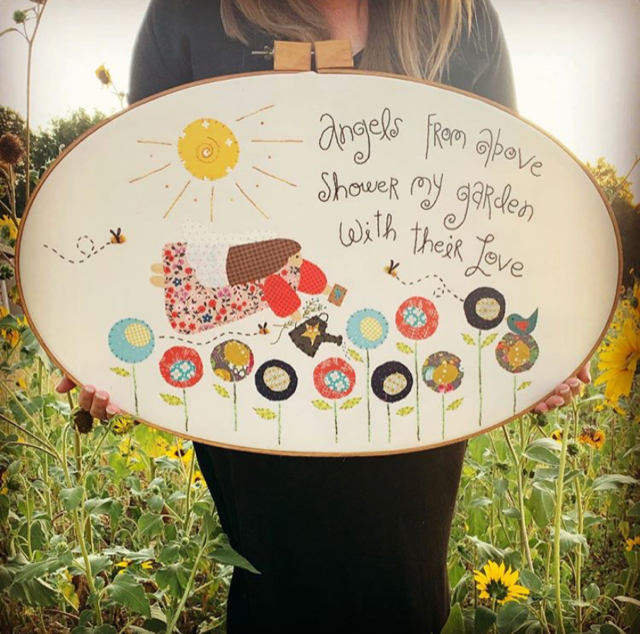
Belle Prairie Botanical Embroidery Collection

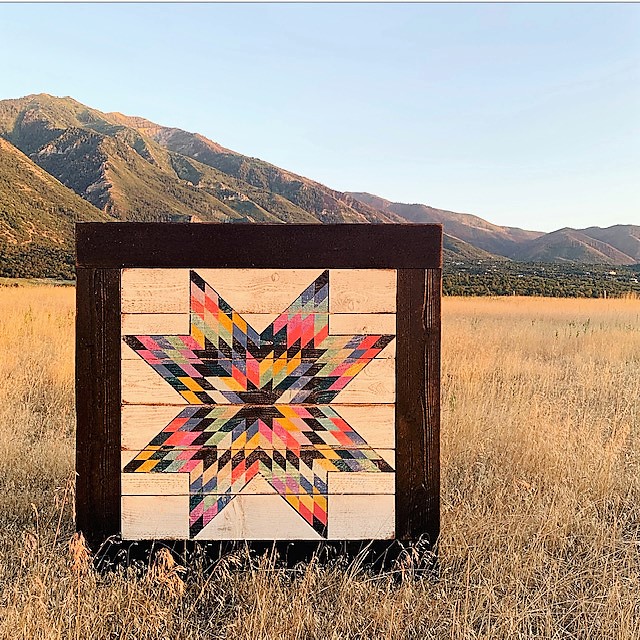
Be still my heart!  I am so in love with the Belle Prairie Collection and the meaning behind all of the flowers that I can't wait to share them with you.  We designed the Belle Prairie Barn Quilt with each block having a flower that was on the prairie.  When we were traveling last year through my grandmother's beloved prairie's we found a garden that had a plaque listing the wildflowers of the prairie and how they were given between friends and loved ones in times of joy and sorrow.  

I was so moved by this garden and our time there on my ancestors land that we decided to make 2018 our Belle Prairie year and one of my favorite parts of this collection are the Botanical Embroidery patterns and kits!  Being on the plains with the grasses blowing and the flowers tucked between their amber blades, I felt for a brief moment that connection to my past, with the women of that land.   My grandmother told stories of it's beauty, which I never quite understood being from the gorgeous rolling hills of upstate New York.  That evening on the plains, I felt it and understood why their friendships and dedications to each other and family was such a gift to them and to me.


Forget Me Knot
Remembrance

Behind me was the cemetery where my great-grandparents and their parents were buried.  In front of me was the land they homesteaded on faith and prayers, with not much else to call their own.  You could tell it was there land being from New York, because is a sea of nothing but grasses as far as your eyes could stretch, their plat was surrounded by large green trees.  It was their hope, planting trees.  Trees take forever to grow, almost as if they planted them for us to know they once loved that flat piece of land.  

I stayed on that dirt road until the sun went down and the crickets began to sing.  Years of stories came alive and will stay in my heart.  These twelve flowers were all they had to give each other as the nearest florist was hundreds of miles away in the big city.  Each with a cherished meaning and a simple beauty.

I designed these patterns to look like the old wall paper botanical drawings my grandparents had in their library.  I wanted a black background to resemble the style of the old black paper photo albums that we would collect and press wildflowers into.  I used a variety of flosses for the stitching to give it an aged non-commercial look and kept the stitches fairly simple like the strokes of a pencil.


Queen Anne's Lace 
Devotion


Rue Anomie
I'm Sorry


Wild Clover
Faith, Hope, Love & a Little Luck


I have six more in the works for a total of twelve, and a spectacular collaboration garden embroidery pattern that will be out very soon.  My goal is to create a new Belle Prairie Botanical Quilt with all twelve prints.  

I hope you love these as much as we do.  I walk into my sewing room everyday and look at the wall with them on it and sigh...like I'm somehow transported to that magical evening on the prairie. I wish I could take you all there with me, but until then I share the Belle Prairie Flowers from one friend to another.

Read more »

Monday

BeaUtahful Map DIY Project

One of our favorite DIY Projects has been our fabric map of the United States and our Utah State Map!  With all the places we travel it means even more as we see the collage of colorful fabrics come together.  We live in a great place, the entire country is filled with beauty and our little state of Utah celebrates its beginnings tomorrow.  Here in Utah we often say BEA-Utahful to describe out state so I am re-posting this project as a free download for anyone who wants a quick and fun project to celebrate where we live.


Materials to Gather

Wood Board Cut to Desired Size
Matte Finish Modge Podge (Lots of it)
Foam Brushes
Background Fabric to Cover the Board
Lots of Fabric Scraps for the different States


The first thing I did was Modge Podge some old burlap onto the front of the wood and I let that sit for 24 hours.  It hardens up the fabric and dried clear.  

(To print the map template right click on the image 
and save to take to your local copy store.)
Next I took the map of the USA to my copy store and had them blow it up to the size I needed to fit my board.  It was pretty cheap.  I recommend getting two copies.  One to cut the states out of and one to reference during the project.  It's especially helpful when you get the the itty bitty states.  I had them print one on card stock so it would be easy to cut apart and trace around.

Next I took my a sharpie marker (light colored) and traced the outline of the US map onto the burlap covered board to make sure I had the outer states in just the right place.


Once my outer line was traced, I started cutting out the states.  I did them one at a time starting with Texas. I traced the individual states onto scarps of fabric using the Frixon pen from Pilot.  I LOVE this pen for anything on fabric because it disappears with heat and gives you a great fine line.  

When you cut out the states, it is helpful to cut 1/8 inch larger than the state template.  This allows for a little overlap and play just in case your lines don't perfectly line up.

Once your state is cut out, dab a generous amount of Modge Podge on the background fabric where the state will go and lay your state on top.  Smooth it out with your fingers or the brush and then gently brush over the fabric state with more Modge Podge.  This will glue the state to the background and seal it too.

When you are finished with all your states...seal it off with one final coat of Modge Podge and it is ready to hang!


For those of us that live in Utah, I put together a pattern to celebrate our state...especially since this week is our state holiday!  Just print out the template...use the same techniques to adhere the fabrics to the backing of a 8" x 10" frame insert and walla...you have a state map too.  It took me about 30 minutes to finish this project...so it's totally possible to finish before the celebrating begins!


(To print the map template right click on the image 
and save to take to your local copy store.)


These projects were super fun to do with my family and I hope you have been inspired to raid your fabric stash too and have a little summer fun with your kiddos too.  Happy 24th BeaUtahful!!!!  We love you xoxo

Read more »

Friday

Walking Tacos

We just arrived back from Minnesota where we were introduced to one of their cultural favorite foods, the Walking Taco.  In our neck of the woods we call them "Wacos"  because we love combining cool names, which is exactly what these tacos are...all good things in a simple fabulous main dish!

A Walking Taco or Waco is a deconstructed taco that is eaten out of a container.  For our Fresh Living segment we used simple chip bags as the outer shell or container, but I have seen all kinds of disposable paper containers used.  Don't you just love a food with no rules?


You can use lots of different meats and toppings, and make them as fancy or as simple as you like.  I've seen them made up for weddings as fish tacos or for game nights with a chill bar complete with tons of toppings.  You can be as creative as you want.  When we ate them in Minneapolis they served them with beef taco meat and it was delicious!!!  I love lean meats so I am going to share my two favorites, Mexican One-Pot Chicken or South of the Border Turkey Skillet.  

 But first, here are the steps for making a fabulous "Waco"...

  • Choose a bag of chips and cut the bag open across the side to create a pocket.
  • Crunch the chips into nice bite size pieces.
  • Add your choice of taco meats.  
  • Layer with cheese, lettuce, cilantro, salsa, sour cream, jalapenos, or any other toppings you love.
  • Squeeze a little lime wedge over the top.
  • Add a plastic fork...and go!


Mexican One Pot Chicken

2 to 3 lbs of Boneless Skinless Chicken
Large Jar of Salsa of your Choice
1 Can of Pinto or Kidney Beans
1 Can of Corn
1 Can of Coke
1/2 Teas. Ground Black Pepper
1 Tbs.Taco Seasoning
1 Teas. Ground Cumin
A Bunch of Cilantro, Chopped
2 Limes


Place chicken to the slow cooker.   Add the salsa, beans, corn, and half a can of coke and seasonings.  Set slow cooker of high and let cook for 4 to 6 hours or until the meat is fork tender.

Using two forks, pull the meat apart into shredded pieces and stir the mixture together.  Add the fresh cilantro and squeeze the juice of the limes over the top.

This recipe is so very simple in a slow cooker.  If you don't have a slow cooker you can combine all of the ingredients in a roaster oven or dutch oven and cook over low heat until chicken if tender and ready to pull apart.  

This is my favorite chicken to make for large parties, camping, or weekly dinners.  It feed a ton and is fabulous in Mexican style salads, on top of flat tortillas, or in tacos!  With one scoop you get your beans, corn, and sauce.  It is fabulous.


 South of the Border Turkey Skillet


2 to 3 Lbs of Fresh Ground Turkey
Olive Oil
1 Can of Corn
1 Can of Kidney Beans
2 Limes
1 Large Onion Chopped
 2 Cups of Pico de Gaio
A Bunch of Cilantro, Chopped
Taco Seasoning

Heat the Olive Oil in a large skillet.  Add the chopped onion, ground turkey and taco seasoning.  Saute until onions are beginning to heat through or turn translucent.  Add the Pico, corn, and beans.  Finish cooking all the ingredients together until the meat is done.  Add the lime juice and cilantro and toss together. 

It is ready to serve.  This is a great meat for someone who really loves the texture of ground meats in their tacos but wants a lighter option...and wow is it fabulous!
Now that I have shared my two favorite meats for tacos, and you know you can use all kinds of chips (Doritos are our favorites)  you can add all the toppings you want and have your Walking Taco ready to go.  The best part of this meal is it's simplicity from beginning to end.  The meats are made ahead, the toppings set out and the clean up is super easy with everything being tossed in the trash.  No plates needed.  

We hope you enjoy this Mid-West favorite as much as we did and catch the Fresh Living segment by following the link.  Enjoy!
Read more »

Printfriendly